Here’s the fix if you’re having trouble charging your AirPod. Here are what you can do.
All AirPods, including the original AirPods, AirPods 3, AirPods 2 and AirPods Pro, can sometimes have trouble charging in the Charging Case.
Not only is it frustrating, it can put an end to your plans for the day. You’ll usually be able to fix the problem at home without contacting Apple or returning the AirPods. Here are some ideas.
1. Check the battery level in the charging case
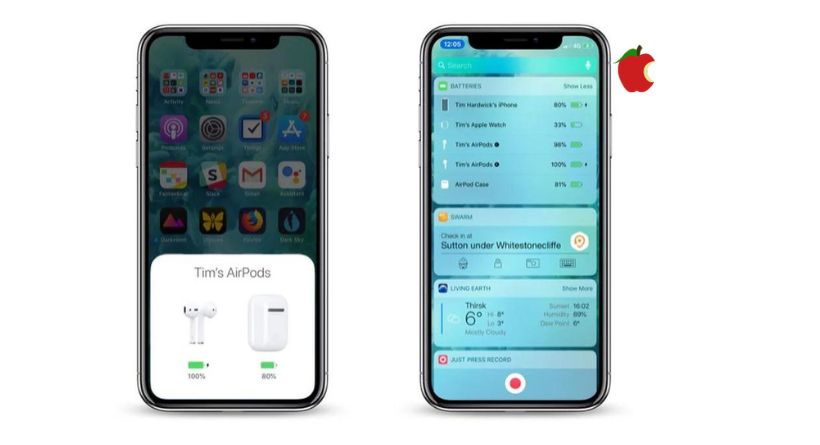
Charging cases are usually the reason AirPods stop charging. A case won’t be able to charge both AirPods if it’s less than 10% charged.
Put the AirPods in your charging case, close the lid, and then check its battery level. Now open it close to your iPhone. Both AirPods and the Charging Case’s battery level will be shown on the iPhone.
You can also check the charge status of AirPods using the Batteries widget in the Today View, accessible by sliding right from the Lock screen or the first screen of apps on the Home screen on your iPhone.
if the charging case has enough battery but one AirPod isn’t charging (no lightning bolt icon), go to the next step.
It is now clear that the cause of your problem was a low battery in the Charging Case, so you should charge it using a Lightning cable. Since a single charge of the Charging Case lasts so long, it is easy to forget to plug it in. So, it is recommended to charge the Charging Case every day or every other day, even for a few minutes. When you are on the go, you won’t be without battery for your AirPods.
2. Insert the AirPod
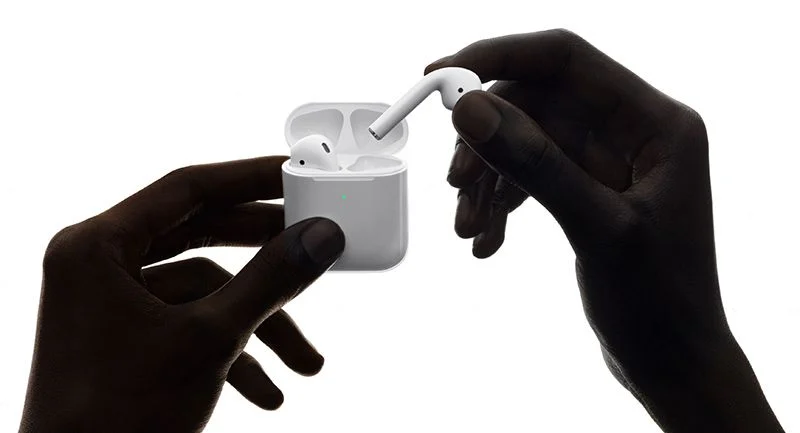
Although the AirPod has plenty of power in the charging case, it may not be able to charge because the earpiece may not be sitting properly in the case. Taking off any accessories, such as foam eartips, will make the charging icon appear when you bring the AirPods close to your iPhone.
If the AirPod still doesn’t charge, you might need to clean the stem or charging case. Check out the tips below..
3. Keep your AirPod and charging case clean
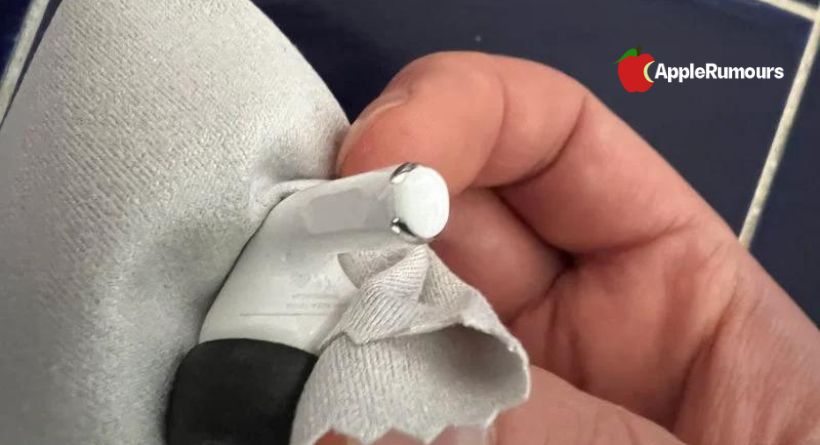
When AirPods don’t charge, it’s usually because the charging contacts are dirty on the stem or inside the charging case. It’s impossible to pass current through this, but you can fix it..
All you need is this.
- Cloth that’s lint-free and
- Q-tip, dental brush
- (optional) alcohol
Make sure you clean the silver contacts on the end of the AirPod using the dry, lint-free fabric.
Cleaning the contacts inside each AirPod bay can also be done with a periodontal brush. Use a Q-tip soaked in water, or sprayed with some isopropyl alcohol (DO NOT spray alcohol on your case). Wipe over the dirt.
Maintain proper contact between your AirPods and Case by cleaning them every week if you use them daily.
4. Reset AirPods
Resetting the Apple AirPods, AirPods 3, AirPods 2 and AirPods Pro will put them back to factory settings. This can be helpful if you’re handing down your wireless earphones to someone else or have any problems with them.
Guide on how to reset AirPods and AirPods Pro:
- Close the case and put the AirPods in.
- Let it sit for 30 seconds, then open it up.
- Go to Settings -> Bluetooth and tap the circled “i” next to your AirPods.
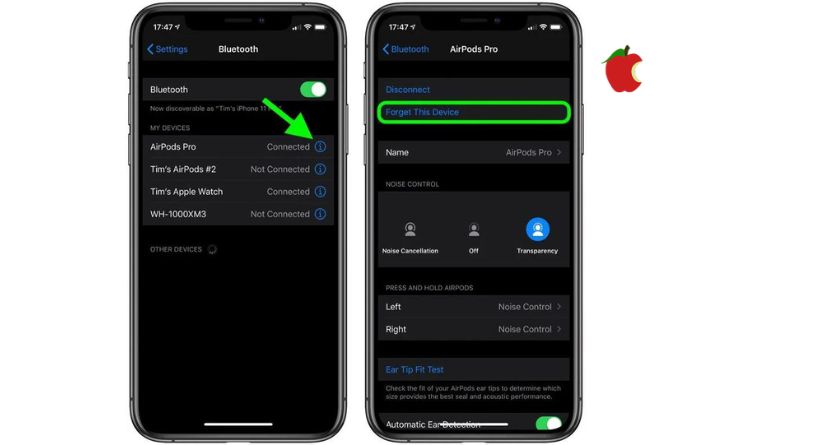
- Tick the Forget This Device box, and then tick it again to confirm it.
- You can see the status light flashing amber if you hold the button on the back of the AirPods case lid for about 15 seconds. If you’re charging via wired connection, you’ll see a status light inside the case. When you’ve got AirPods Pro, the status light is on the front.
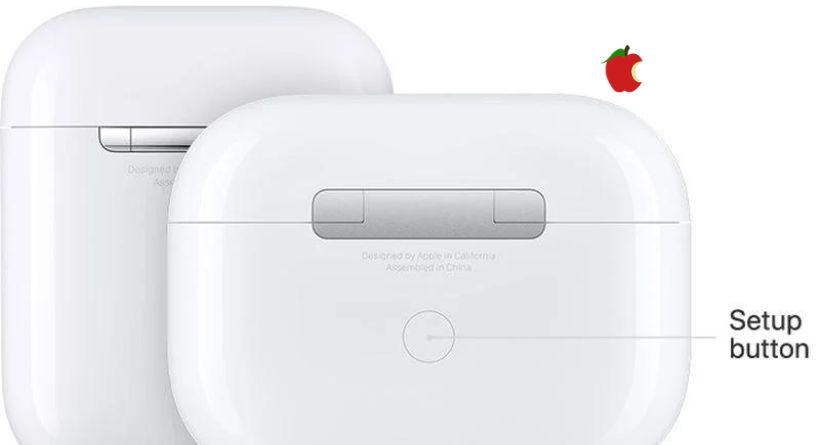
- Connect your AirPods by placing them near your device and following the directions on your device.
You’re done! If you reset your AirPods, they won’t recognize any of your iCloud-linked devices. When you open the AirPods case near an iOS device, the setup process will start.
Get in touch with Apple Support
If none of these fixes the issue, contact Apple Support. Apple’s team can repair or replace your AirPod if necessary.
