Even though I am a huge fan of my iPad Pro, I do not use it very much beyond being a simple multimedia tablet. It is often the case that, when it comes to real work, I turn to a real laptop to complete my tasks. My first step towards reversing the trend was to buy the excellent Magic Keyboard as a companion product for the iPad
It turns out that turning the iPad into a better laptop replacement was simply a matter of changing my workflow, as well as making some minor adjustments to the iPad’s settings, and the system turned out to be just as effective as a laptop device.
Put your favorite apps on the dock

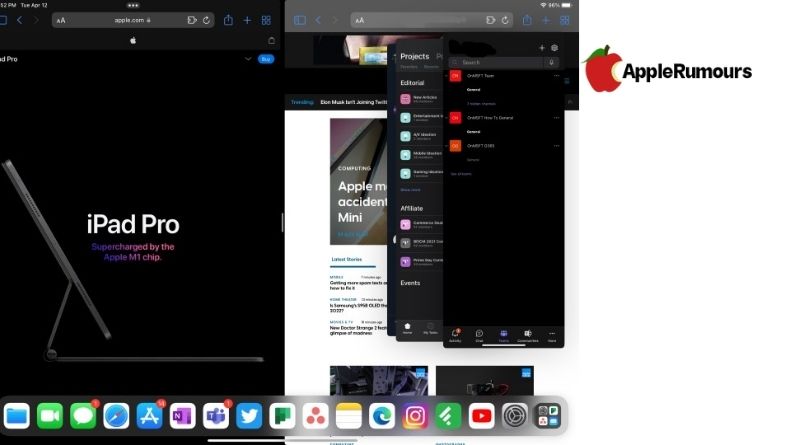
The dock and the taskbar are among my favorite features of the macOS and Windows 11 platforms, which enable you to pin your favorite apps to the taskbar for quicker access. I don’t know if you know this, but as part of iPadOS 15, some tweaks have been made to multitasking, such as the ability to slide over a third app when multitasking, so the dock on an iPad can be used similarly.
My iPad dock is pinned down with my favorite apps that I use for work, so I have them at my fingertips. There are several apps on the list, including Microsoft Teams, Feedly, and Asana if you’re interested, as well as various social media tools.
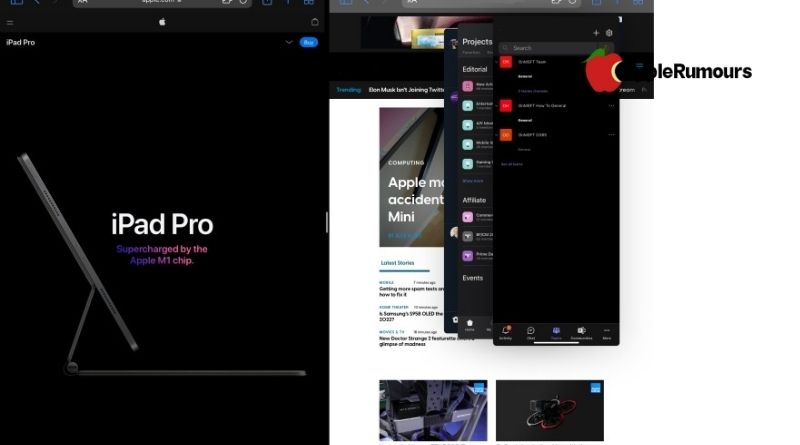
By pinning these apps in the dock, even when I have two screens open, for example, two sessions of Safari running at the same time – I can pull up on the dock, and pull up a third window like Feedly or Teams in the middle of the screen. In this case, a slide-over-shaped app appears that appears in the same manner as an iPhone app.
In some ways, this is very similar to how I use Teams on both Mac and Windows, where I keep the Team app minimized and only bring it up when I need it. As a result, if I repeat this process from there, I will be able to pull up the iOS-like app switcher from within any app that is in Slide Over mode, and from there, I will be able to switch between any other open apps that I have put in Slide Over mode.
On my iPad, it has been a great way to access multiple apps at once, without having to go constantly to my home screen, and I have also been able to save a lot of time by responding to Team messages right from Asana. It is so convenient to have all the apps I need at my fingertips, just a simple drag away.
Use Safari instead of Google Chrome

Second, you can also use the iPad’s native web browser, Safari, to browse the web. On the iPad OS, Safari is one of the best apps because it automatically gives you the desktop version of certain websites. The browser will fetch you desktop websites, as a rule, so you don’t need to specifically tell it to do so as you would in Chrome.
It also comes with a scaling feature that allows you to reduce the size of websites so they will fit more on your screen. You can find it It’s up there at the top, right next to the address bar. Lastly, Safari also supports multiple windows, so if you drag tabs to the left or right side of your screen, you can multitask at the same time.
It is also capable of scalability and multi-window support, so I can split Safari windows in two (just like I do on my Mac.) One side will be my WordPress flow, and the other side will contain my open tabs and articles I will reference when I am writing. If I compare my web browsing experience to what I usually do on my Windows and Mac machines, the difference is barely noticeable when websites scale correctly.
Change the size of the screen text

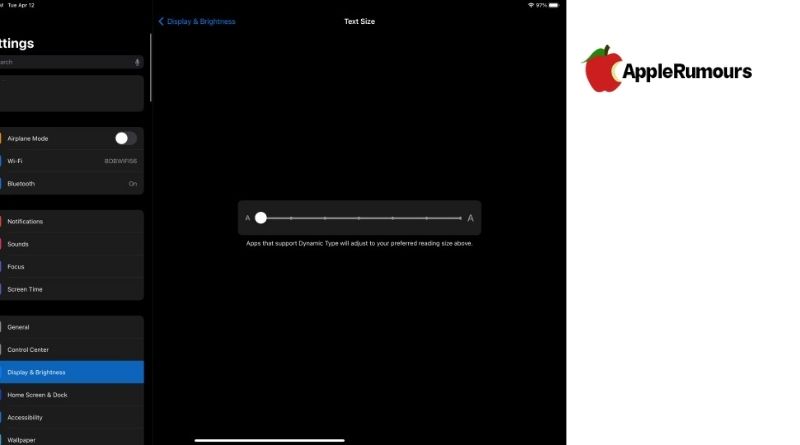
Next, there is a question about the size of the text. Because the iPad Pro has a display with a very high resolution of 2732 x 2048 pixels, I have always wanted to change the scaling so more things can fit on the screen. There is a hidden scaling feature in iPad OS that is similar to those found in Mac OS and Windows. In supported apps, this can make text appear smaller so you will have more space to work with.
If you go to Settings > Display & Brightness > Text Size, you will be able You can use a slider to change the text size. Just click it when the slider is dragged to the bottom, the text size will be adjusted in apps that support Dynamic Type.
For example, Twitter, Microsoft Teams, and a wide variety of other apps support Dynamic Type. It has a huge impact when it comes to Twitter, for example, as more tweets can be displayed at the same time. Additionally, it increases the number of chat messages displayed in Teams.
A few tweaks for the iPad Magic Keyboard

Last but not least, I want to share with you a tip that involves the iPad Magic Keyboard. During our review of this optional accessory, we found that it can be a game-changer in terms of how you use your iPad.
It creates the illusion of floating the iPad in the air whilst adding a MacBook-like keyboard and trackpad so that you can use them. Still, I use some additional tweaks to make my iPad feel more like a laptop, making it feel more like a tablet.
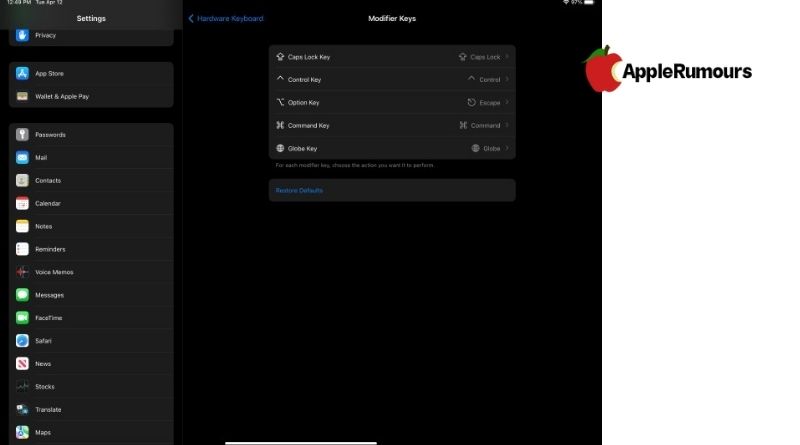
My first tweak involves remapping the keys on the iPad. As the Magic Keyboard does not have an “Escape” key, I remapped the Option Key to bring back the lost function. You can change this setting by going to Settings > General > Keyboard > Hardware Keyboard > Modifier Keys.
Using this method, the unused key can be remapped to something more useful. I have modified the Option key to function as the escape key so that when I am watching videos on full screen on YouTube, I can exit by using the escape key.
Secondly, I have modified the keyboard shortcuts in Magic The keyboard has certain key shortcuts that can be used in apps, similar to what I am familiar with using on macOS or Windows 11.d in apps. Upon long-pressing the Command key, you’ll be presented with a pop-up window with keyboard shortcuts.
For example, in Safari you have shortcuts that are similar to the ones that you would find on your desktop, including copy-paste and shortcuts for opening new tabs, navigating through your history, and more.
Additionally, there is a shortcut for settings, refreshing, and searching when you are using Twitter. On a mobile-first device such as an iPad, these can make all the difference in saving you time when you’re using it.
As is the case with macOS and Windows, there are also keyboard shortcuts for iPad navigation too, just as there are on Mac OS and Windows. You can take a screenshot with Command + Shift + 3 and go to the home screen with Command + H.
You can bring up the dock with Command + Option, + D and show and hide the dock with Command + Shift + Tab. It is possible to add additional keyboard shortcuts to the iPad by going to its Accessibility settings to do so.
This allows me to use my iPad more effectively
Now that I have made these tweaks, I am finding that I am using my iPad a lot more for work purposes. Although I have become much more efficient as a result of working with them, I still need a bit of time to get used to using mobile apps rather than desktop ones. If you want to use your iPad as your main computer for web-based work, however, these suggestions may help you.
