Your iPhone likely has photographs in a number of various file kinds (like HEIC, JPEG, PNG, etc.) The majority of these file types work with all popular systems. However, you may need to save images to PDF for class assignments, paperwork documentation, or other particular uses.
Three methods to convert photos to PDF on the iPhone and iPad are shown in this post.
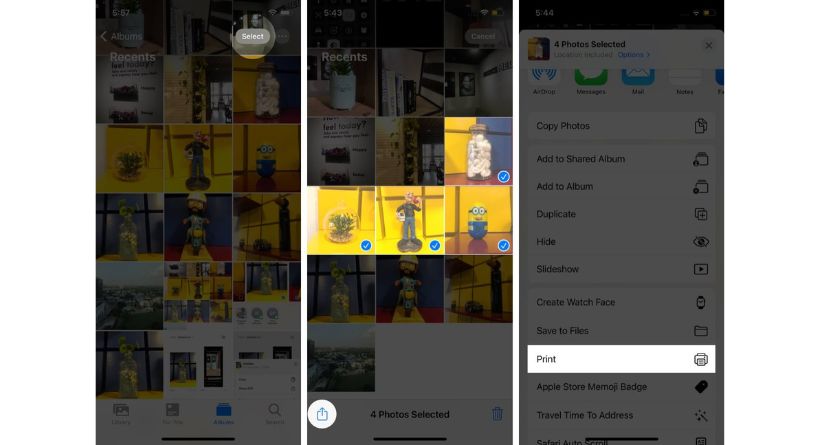
How to convert a picture to PDF on iPhone using Printer Options
- Tap Albums after opening Photos on your iPhone. Tap Select again to select one or more photographs.
- Click Share.
- From the Share Sheet, choose Print.

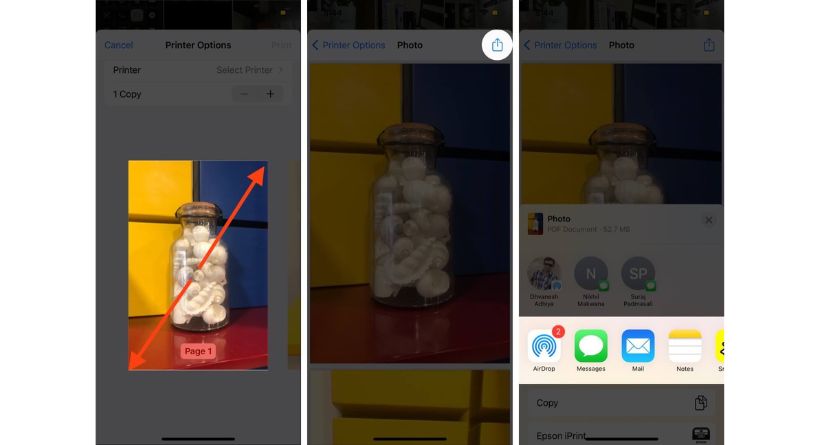
- Pinch outward with two fingers on the picture preview to save it as a PDF.
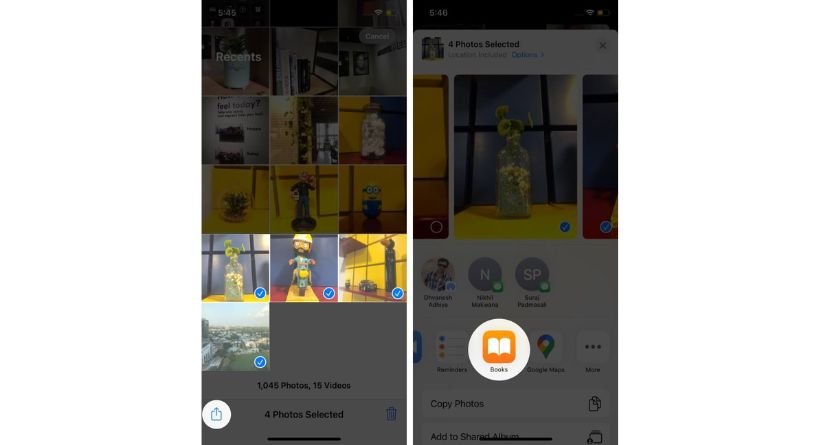
Select Books on the Share Sheet to turn a picture into a PDF
- Tap Share after selecting the images.
- On the Share Sheet, tap Books. If necessary, swipe horizontally across the row of app icons.
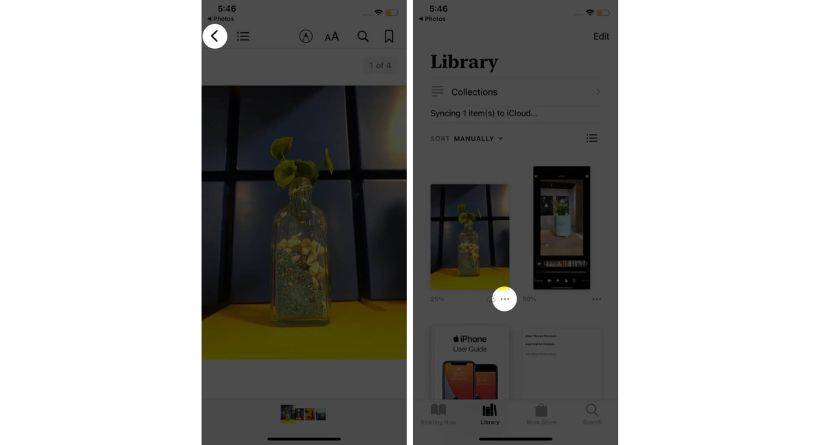
- The images will instantly become a PDF file and launch in Books. There, it will be preserved.
- To go back, press the screen and then the back arrow.
- Then click more (three dots).
Save photos as PDF on iPhone and iPad using the Files app
You can rapidly make PDFs using Files. The image must be stored under Files, however. Therefore, if you already have photographs here, just go on to the next stage. You may see instructions for enabling these external cloud storage services within Files if they are in Drive, Dropbox, One Drive, etc.
Alternatively, to transfer the images from Photos to Files: Choose the pictures you want to save from Photos, then touch the Share button.
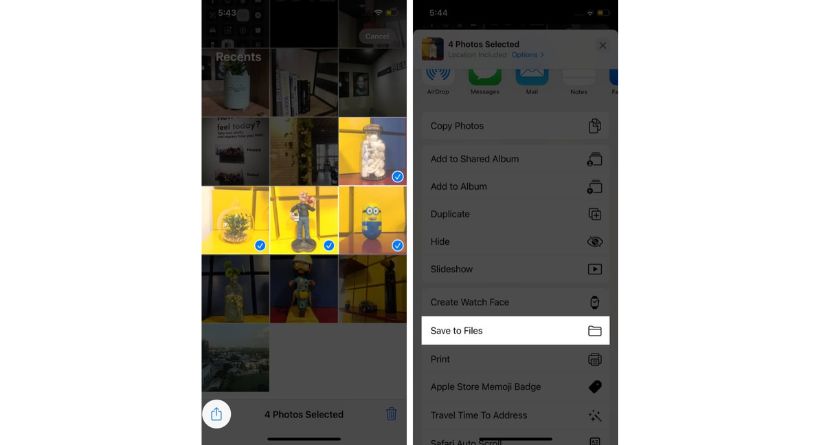
Once that’s out of the way, here are the steps to create a PDF from Photos on the iPhone.
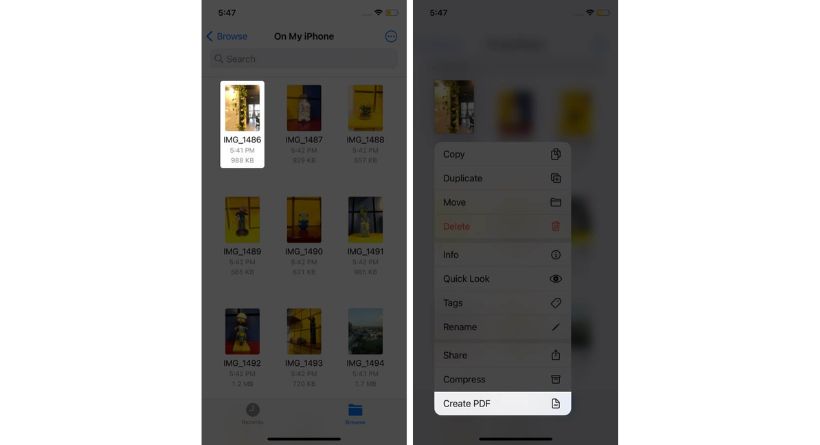
- Go to Files and look for the picture.
- Simply long-press a picture and choose Create PDF to turn it into a PDF.
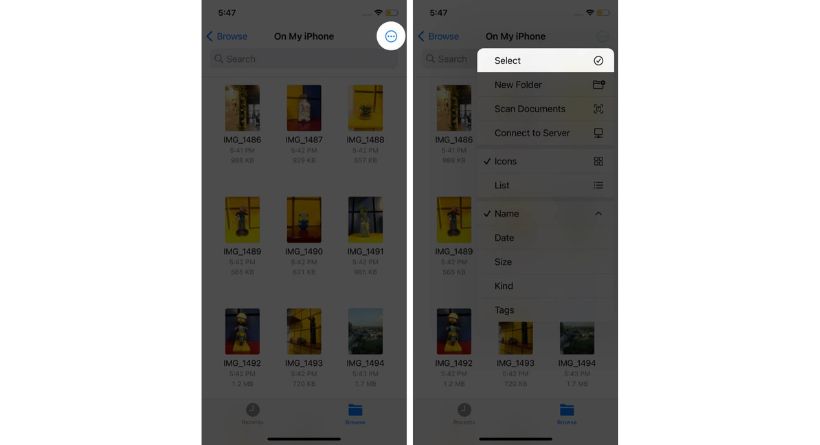
- To create a PDF from a number of images: Select by selecting More (three dots within a circle) from the upper right corner.
- Now tap several images. When finished, choose Create PDF by tapping more in the bottom right corner.
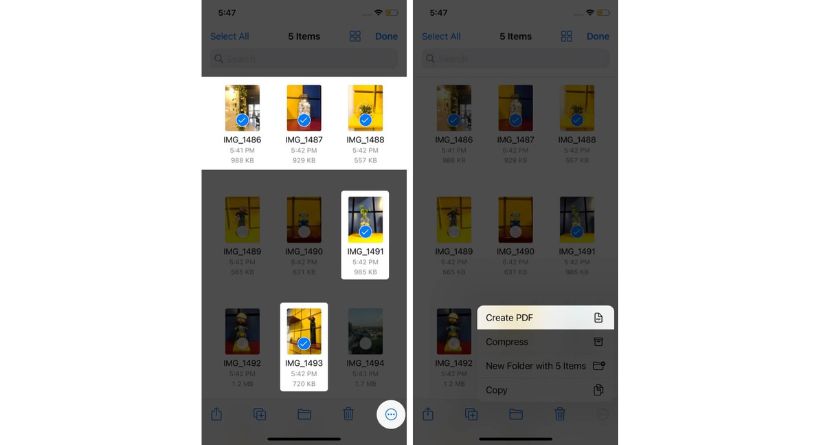
Files will convert the photos into a PDF. The data will be stored in the same folder as the original photos. To copy, transfer, or distribute this PDF using Files, see our complete tutorial.
Video: Convert photos to PDFs using the Shortcuts App
We hope that this advice enabled you to use your iPhone or iPad to convert images to PDF. All three approaches are equally effective, but I like the one that utilises the Books app. By using this technique, the PDF is promptly prepared and securely preserved there for later use.
Also available are third-party applications like PDF Expert (image to PDF conversion is a Pro feature).