With iOS, you can record your screen activity with the new Control Center function. You can capture gameplay, walk through a tutorial, display a bug, and more, and it works on both iPhones and iPads.
How to Enable Screen Recording
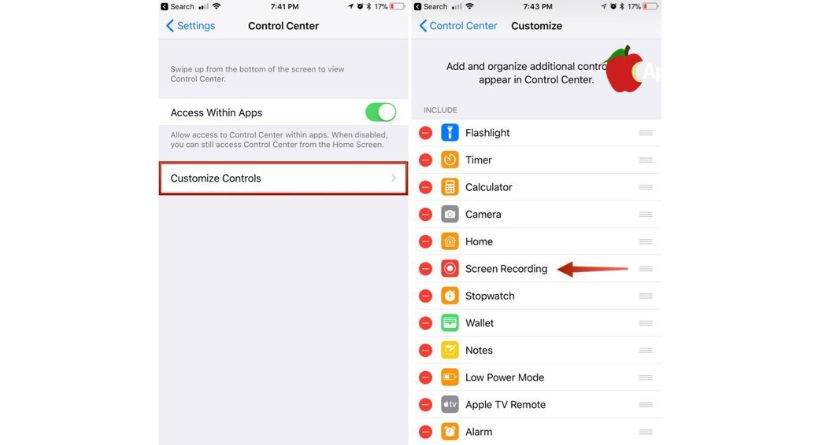
You can add the screen recording icon to Control Center in Settings.
- Click on Settings.
- Click Control Center.
- Check “Customize controls.”

- Click the + button next to “Screen Recording” to include it.
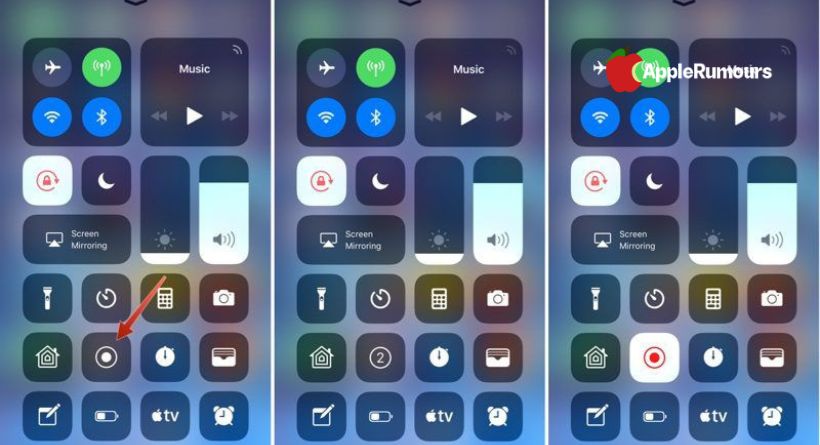
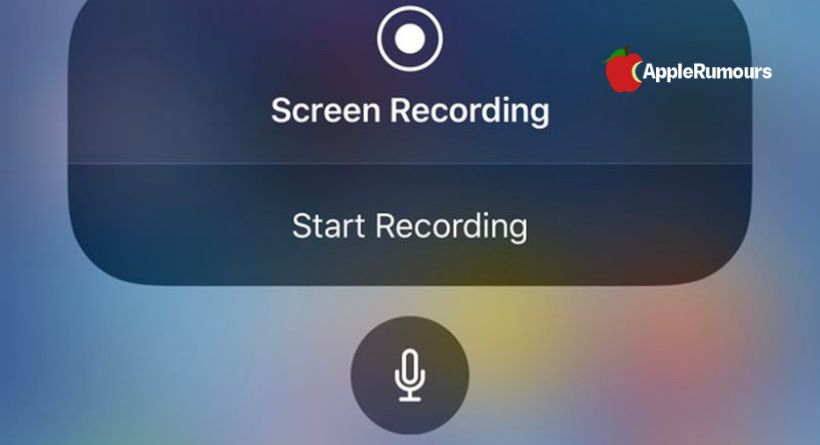
Here’s how you can record your screen.
- Open the Control Center.
- Find the recording icon. Look for two circles.
- After a three second countdown, your iPhone or iPad will start recording your screen.
As long as screen recording is on, a red bar appears across the top of the screen so you know whether it’s on or not.
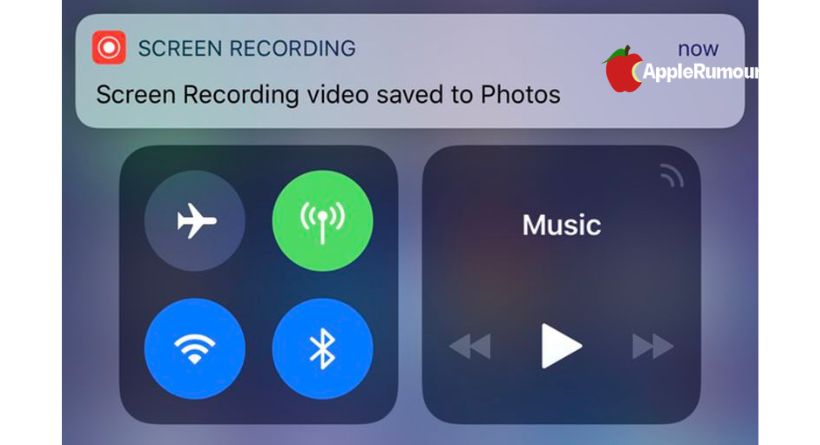
Ending the recording
Tap the red bar at the top of the screen to confirm you want to end the recording, or go back to Control Center and toggle off the screen recording icon. Your video will then be saved to Photos.
Options for recording the screen.
Several options are available in the Control Center when making a screen recording. Simply 3D Touch the screen recording icon to bring up these options.
Here you can toggle the microphone audio on and off, and start a screen recording. Only these options are available ,it’s pretty basic.