If you want to record presentations, lessons, or instructional films on your Apple Mac computer without having to pay for any additional software. You’ll be happy to learn that Apple has a built-in programme that makes screen record on Mac with sound simple. You may record audio and video on your MacBook laptop or Mac OS computer using the short instructions in this article.
Our previous tutorial, which explains how to take screenshots on your Mac computer, is the place you need to go if you’re just interested in taking screenshots on your Mac computer.
This article will demonstrate how to screen record on a Mac, enabling you to record tutorial videos, how-tos, and other content. Depending on your requirements, you may use the Apple programme to record the whole Mac screen or just a specific area. Once recorded, the screen video may be used to create tutorials, animated gifs, and documentation as required.
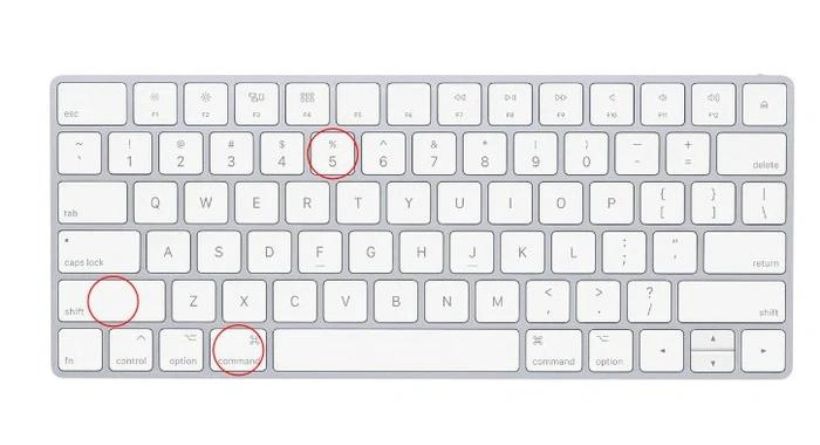
You may use the shortcut command Shift + Command + 5 to launch a little screenshot and screen recording programme that Apple has developed to assist you in doing this. As seen in the illustration below, this will reveal a little toolbar at the bottom of your screen with a number of choices. The bottom right-hand corner of the toolbar and the screen recording icons, which are indicated in the yellow box on the picture below, are the two main elements we will focus on in this article. These enable you to screen record the full Mac desktop or a specific area that you may choose by using the marquee tool.
Screen record on Mac with sound
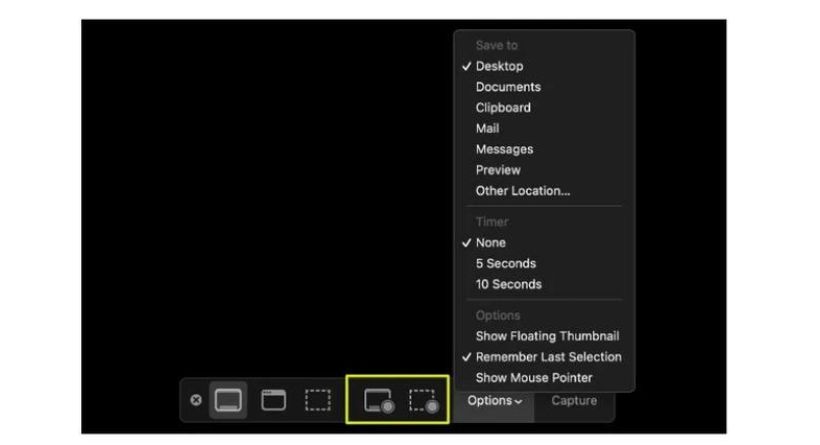
- You may record your full screen using the first icon on the left, which was highlighted above. Press the symbol to begin recording, and your pointer will turn into a camera. To record the whole screen, just click anywhere on the screen, or use the on-screen buttons to click record. Press the Command + Control + Esc keys together to stop recording, or click the on-screen buttons once more.
- After you have recorded your screen, you may share, edit, and save the recording using the thumbnail. If no changes need to be made, just slide the thumbnail to the right, and the recording will be stored without your intervention. You may transmit the recording by email, text message, or social media by clicking the universal share symbol or by selecting the thumbnail to launch the Trim editing mode.
- You may choose a portion of your screen to be captured by clicking the dashed box symbol displayed above on the right. Simply click within the area you’ve chosen to start recording, then click again to stop. You can also use the keyboard shortcut Command + Control + Esc to halt recording.
Using MacX Video Converter Pro
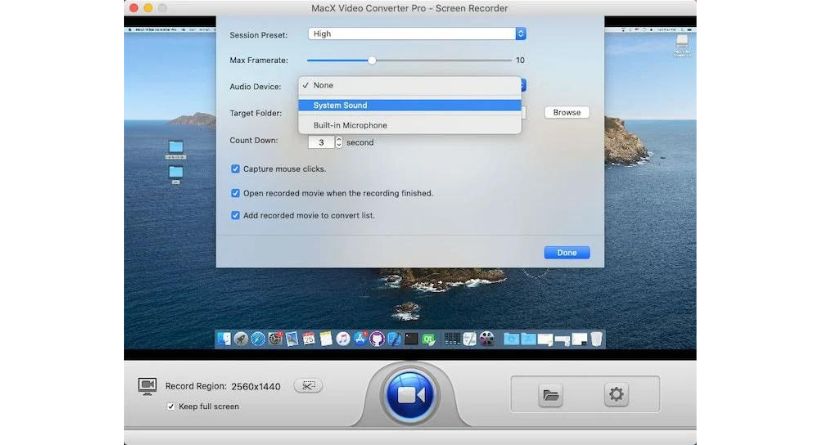
In addition to the shortcuts, a reputable Mac screen recorder application is also recommended since it comes with other extra functions. With audio (either system audio or microphone sound), you may screen record your Mac’s complete screen or a portion of it for free with MacX Video Converter Pro. You may choose the video recording quality, change the video frame rate, add sound effects, and more before screen capture. And regardless of your degree of experience, you may readily understand how to record the Mac screen.
You just need to click the “Screen Recorder” button on the main interface after installing this Mac screen capture programme. The capture region may then be selected by selecting “Keep Full Screen” or “Crop Region.” If you also need to capture audio, choose system audio or microphone sound in the meanwhile. When everything is prepared, just hit the blue “Start Record” button in the centre, and the application will shortly begin recording the Mac screen.
You may easily put the captured screen footage into this video converter for additional conversion and editing after the Mac recording is complete. With the 420+ preset profiles offered, you may convert your recorded screen video to MP4, WebM, H264, H265, FLV, AVI, etc. for posting to YouTube, Facebook, Instagram, or playing on Samsung, PS4/5, Xbox, iPhone, or iPad.
Using QuickTime Player
You may use the Apple-provided QuickTime Player to record your Mac’s screen together with audio. Choose it from your programmes folder, and then from the top menu bar choose File > New Screen Recording. You may modify the audio recording settings to your chosen microphone or enable the option to display mouse clicks throughout your recording by clicking the arrow next to the record button on the toolbar that appears as shown below. You may include audio recording in your screen recording by selecting a microphone from the selections.
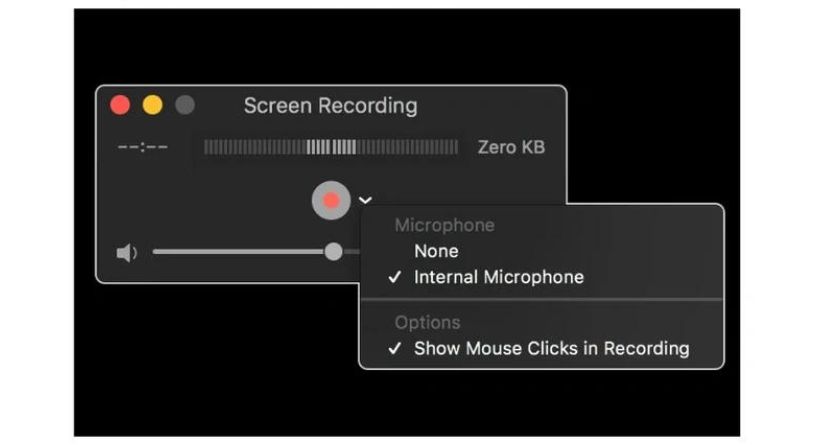
Simply moving the volume slider will allow you to listen to your audio while recording. Simply down the level or use headphones with a microphone if you hear auditory feedback.
When you click while the recording is being made, a black circle will appear around your pointer if you have chosen to show mouse clicks in the video. Making it simpler for onlookers to see the alternatives you are clicking on with your mouse.
When you’re ready to begin recording, just click the red record button, then click anywhere on the screen to record the whole thing, or drag to choose a section of the screen to record, then click within that area to start the recording. Just click the record button in the QuickTime Player toolbar again to stop recording, or use the keyboard shortcut Command + Control + Esc.
The QuickTime Player will instantly launch the recorded video as soon as you finish recording, enabling you to edit, play, and share it as needed.